Руководство для начинающих: различия между версиями
м (→Preferences) |
м (→Настройки) |
||
| Строка 21: | Строка 21: | ||
[[File:NewPlayerOptions.png|left|thumb|The New Player Options menu]] Вы получили проходку и зашли на сервер, первое что вам нужно сделать перед игрой это создать персонажа, для этого нажимаем кнопку '''Setup Character''' в меню New Player Options, которое находится у вас на главном экране. | [[File:NewPlayerOptions.png|left|thumb|The New Player Options menu]] Вы получили проходку и зашли на сервер, первое что вам нужно сделать перед игрой это создать персонажа, для этого нажимаем кнопку '''Setup Character''' в меню New Player Options, которое находится у вас на главном экране. | ||
После этого открывается редактор персонажа в котором имеются три основные вкладки это '''Character Settings''', '''Preferences''' и '''Keybinds'''[[File:Character_Settings_-_General.png|thumb|Setup Character window]] | После этого открывается редактор персонажа в котором имеются три основные вкладки это '''Character Settings''', '''Preferences''' и '''Keybinds'''[[File:Character_Settings_-_General.png|thumb|Setup Character window]] | ||
=== Character Settings === | === Character Settings === | ||
| Строка 39: | Строка 37: | ||
==== Background ==== | ==== Background ==== | ||
Эта вкладка позволяет дополнить информацию о вашем персонаже. | Эта вкладка позволяет дополнить информацию о вашем персонаже. | ||
[[File:Character Settings - background.png|thumb|left|background tab]]* '''Flavor Text, Naked and Silicon:''' Информация о внешности вашего персонажа. Это то, что видят игроки взаимодействующие с вашим персонажем . Наиболее важным является обычный текст Flavor описывающий вашего персонажа, Naked - дополнительный текст, который описывает вашего персонажа, когда он голый. Silicon появляется, когда вы играете за борга, что не рекомендуется новичкам, так что пока он можете забыть про него. | [[File:Character Settings - background.png|thumb|left|background tab]] | ||
* '''Flavor Text, Naked and Silicon:''' Информация о внешности вашего персонажа. Это то, что видят игроки взаимодействующие с вашим персонажем . Наиболее важным является обычный текст Flavor описывающий вашего персонажа, Naked - дополнительный текст, который описывает вашего персонажа, когда он голый. Silicon появляется, когда вы играете за борга, что не рекомендуется новичкам, так что пока он можете забыть про него. | |||
* '''OOC notes:''' Здесь вы рассказываете о своих предпочтениях в ролевой игре (например, фетишах, гендерных предпочтениях, о том, что вам нравится и не нравится делать) и вообще о том, что вы хотели, чтобы другие игроки знали OOC. | * '''OOC notes:''' Здесь вы рассказываете о своих предпочтениях в ролевой игре (например, фетишах, гендерных предпочтениях, о том, что вам нравится и не нравится делать) и вообще о том, что вы хотели, чтобы другие игроки знали OOC. | ||
* '''Headshot Image:''' Вы можете добавить ссылку на изображение вашего персонажа, если желаете, главное чтобы оно соответствовало примерно вашему персонажу и игровой атмосфере, чтобы более подробно узнать как это сделать [жмякай сюда]. | * '''Headshot Image:''' Вы можете добавить ссылку на изображение вашего персонажа, если желаете, главное чтобы оно соответствовало примерно вашему персонажу и игровой атмосфере, чтобы более подробно узнать как это сделать [жмякай сюда]. | ||
* '''Security and Medical records:''' Эти записи будут доступны определенным отделам в игре и могут влиять или не влиять на взаимодействие персонажей из этих отделов с вашими. Довольно бесполезный раздел для новичков совершенно необязателен к заполнению. | * '''Security and Medical records:''' Эти записи будут доступны определенным отделам в игре и могут влиять или не влиять на взаимодействие персонажей из этих отделов с вашими. Довольно бесполезный раздел для новичков совершенно необязателен к заполнению. | ||
==== Appearance ==== | ==== Appearance ==== | ||
На этой вкладке настраивается общий вид спрайта вашего персонажа, который вы можете увидеть в правой части окна. [[File:Character Settings - Appearance.png|thumb|Appearance Tab]] | На этой вкладке настраивается общий вид спрайта вашего персонажа, который вы можете увидеть в правой части окна. [[File:Character Settings - Appearance.png|thumb|Appearance Tab]] | ||
| Строка 58: | Строка 58: | ||
[[File:Mismatched parts button.png|frameless]] Позволяет использовать спрайты персонажей, недоступные для выбранной расы. | [[File:Mismatched parts button.png|frameless]] Позволяет использовать спрайты персонажей, недоступные для выбранной расы. | ||
[[File:Advanced colors button.png|frameless]] Включает расширенный режим раскраски, позволяющий создавать более уникальные цветовые комбинации со спрайтом персонажа, хотя этот режим может быть немного запутанным для новых игроков | [[File:Advanced colors button.png|frameless]] Включает расширенный режим раскраски, позволяющий создавать более уникальные цветовые комбинации со спрайтом персонажа, хотя этот режим может быть немного запутанным для новых игроков.[[File:Character Settings - Markings.png|left|thumb|Markings tab]] | ||
[[File:Character Settings - Markings.png|left|thumb|Markings tab]] | |||
==== Markings ==== | ==== Markings ==== | ||
Эта вкладка позволяет еще больше кастомизировать персонажа, работая как дополнение к предыдущей вкладке. | Эта вкладка позволяет еще больше кастомизировать персонажа, работая как дополнение к предыдущей вкладке. | ||
Вы можете выбрать различные метки для частей тела персонажа, которые изменят его внешний вид и позволят использовать различные цвета. Вы можете использовать несколько меток для одной части тела и редактировать их наложение, чтобы создать различные эффекты по своему усмотрению. | Вы можете выбрать различные метки для частей тела персонажа, которые изменят его внешний вид и позволят использовать различные цвета. Вы можете использовать несколько меток для одной части тела и редактировать их наложение, чтобы создать различные эффекты по своему усмотрению. | ||
==== Speech ==== | ==== Speech ==== | ||
[[File:Character Settings - Speech.png|thumb|Speech tab]] | [[File:Character Settings - Speech.png|thumb|Speech tab]] | ||
В данной вкладке вы настраиваете параметры, связанные с речью вашего персонажа в игре. | |||
* '''Speech preferences:''' Они позволят вам настроить некоторые параметры, касающиеся определенных механик, связанных с речью вашего персонажа в игре. Если оставить их по умолчанию, то для этих настроек будут использоваться значения, заданные выбранной расой. | * '''Speech preferences:''' Они позволят вам настроить некоторые параметры, касающиеся определенных механик, связанных с речью вашего персонажа в игре. Если оставить их по умолчанию, то для этих настроек будут использоваться значения, заданные выбранной расой. | ||
| Строка 72: | Строка 74: | ||
** ''Custom runechat color:'' Когда персонаж говорит, над его головой отображается текст, который он произнес, эта опция позволяет настроить цвет этого текста. | ** ''Custom runechat color:'' Когда персонаж говорит, над его головой отображается текст, который он произнес, эта опция позволяет настроить цвет этого текста. | ||
* '''Vocal bark preferences:''' Когда ваш персонаж использует глагол ''сказать'', он будет издавать звуки, похожие на те, что издают персонажи в других играх, таких как Don't Starve Together или Undertale. Эти звуки называются "лай", и эти опции позволяют настроить лай персонажа. Вы можете предварительно просмотреть свой лай, чтобы убедиться, что он звучит так, как вам хотелось бы. | * '''Vocal bark preferences:''' Когда ваш персонаж использует глагол ''сказать'', он будет издавать звуки, похожие на те, что издают персонажи в других играх, таких как Don't Starve Together или Undertale. Эти звуки называются "лай", и эти опции позволяют настроить лай персонажа. Вы можете предварительно просмотреть свой лай, чтобы убедиться, что он звучит так, как вам хотелось бы. | ||
==== Loadout ==== | ==== Loadout ==== | ||
[[File:Character Settings - Loadout.png|left|thumb|Loadout tab]] | [[File:Character Settings - Loadout.png|left|thumb|Loadout tab]] | ||
| Строка 80: | Строка 83: | ||
[[File:Preferences tab.png|thumb|Preferences tab]] | [[File:Preferences tab.png|thumb|Preferences tab]] | ||
Вкладка "Параметры" - это раздел, в котором вы можете настроить общие параметры игры. Она похожа на страницу конфигов в других играх. Вкладка состоит из трех различных разделов настроек. Вы можете настроить их так, как считаете нужным, однако если вы совсем новичок в игре, рекомендуется не менять значения большинства конфигов (за исключением предпочтений контента), а оставить их такими, какими они являются по умолчанию. Далее будут рассмотрены разделы данной вкладки '''ПРОШУ ЕСЛИ ВЫ НОВЕНЬКИЙ НАСТРОЙТЕ ИХ КАК РЕКОМЕНДУЕТ РУКОВОДСТВО''' | Вкладка "Параметры" - это раздел, в котором вы можете настроить общие параметры игры. Она похожа на страницу конфигов в других играх. Вкладка состоит из трех различных разделов настроек. Вы можете настроить их так, как считаете нужным, однако если вы совсем новичок в игре, рекомендуется не менять значения большинства конфигов (за исключением предпочтений контента), а оставить их такими, какими они являются по умолчанию. Далее будут рассмотрены разделы данной вкладки '''ПРОШУ ЕСЛИ ВЫ НОВЕНЬКИЙ НАСТРОЙТЕ ИХ КАК РЕКОМЕНДУЕТ РУКОВОДСТВО''' | ||
==== General ==== | ==== General ==== | ||
The general preferences contain settings related to the appearance of different elements in-game, including the appearance of different types of information or texts in the game window as you play as well as the appearance of different interfaces you'll interact with. It also contains options related to your chance to become an antagonist automatically during the game. Although this mechanic is disabled in the game and the appearance of antags in the station is incredibly rare, it's recommended that you make sure your '''DISABLE ALL ANTAGONISM''' option is "Yes" if you're new to the game. | The general preferences contain settings related to the appearance of different elements in-game, including the appearance of different types of information or texts in the game window as you play as well as the appearance of different interfaces you'll interact with. It also contains options related to your chance to become an antagonist automatically during the game. Although this mechanic is disabled in the game and the appearance of antags in the station is incredibly rare, it's recommended that you make sure your '''DISABLE ALL ANTAGONISM''' option is "Yes" if you're new to the game. | ||
Версия от 06:04, 16 апреля 2024
Это руководство создано для удобства начала игры на сервере BlueMoon. Внимание! Оно не обязательно, но рекомендуется к прочтению если вы недавно играете в SS13 или собственно говоря даже не смогли пройти стадию верификации на наш сервер.
Что такое SS13 и собственно говоря BlueMoon?
Приветствую тебя читатель этого гайда и безумец решивший ознакомиться с сервером BlueMoon! Если ты пришел с SS14, то тут нет ничего сложного. Тебе стоит просто пройти верификацию. Если же ты уже её прошёл, готовься к увлекательному изучению игры и её механик.
Space Station 13 - это многопользовательская песочница, в которой большое внимание уделяется взаимодействию игроков и ролевой игре. Она выполнена в стиле ретро-РПГ и обладает большим количеством контента для исследования.
В начале каждого раунда каждому игроку назначается роль на борту станции. Существует множество профессий, например, ученый, проводящий исследования и разработку новых технологий, доктор, пытающийся сохранить жизнь людям или другим расам, или простой уборщик. Играть можно по-разному, но будьте готовы, что некоторые взаимодействий на станции будут непристойными и 18+. Каждый новый раунд на космической станции 13 отличается от прошлых.
BlueMoon - сервер базирующийся на платформе SS13, чтобы кратко описать, что вас ждет процитирую золотое правило: "Основное внимание на этом сервере уделяется свободе самовыражению, а также веселой, расслабленной и дружелюбной атмосфере. Делайте все возможное в качестве сотрудника Экипажа или Антагониста, чтобы способствовать веселью, а не портить чужой раунд". Основой данного проекта является, то что вы можете свободно создавать различные ситуации интересные как и вам, так и лицам в них участвующих, не особо опасаясь наказания.
Стадия верификации и получения ВЛа
Так ты узнал основную идею сервера? Отлично, а теперь давай получим доступ на сервер и познакомимся с дискордом проекта!
Чтобы ты смог пройти верификацию, тебе нужно прочесть правила в дискорд канале, подать заявку, заполнить анкету и для удобства это все в одном канале под названием правила игрового сервера. Анкета состоит из 7 пунктов, которые надо заполнить и чтобы ответить на все вопросы стоит хорошенько прочитать правила игрового сервера. После того как анкета заполнена и отправлена надо дождаться пока за нее возьмется регистратор, чтобы опросить тебя по правилам и одобрить твое прошение на ВЛ.
Настройки
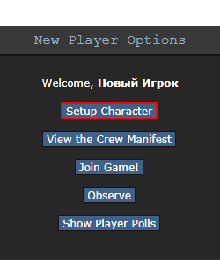
Вы получили проходку и зашли на сервер, первое что вам нужно сделать перед игрой это создать персонажа, для этого нажимаем кнопку Setup Character в меню New Player Options, которое находится у вас на главном экране. После этого открывается редактор персонажа в котором имеются три основные вкладки это Character Settings, Preferences и Keybinds
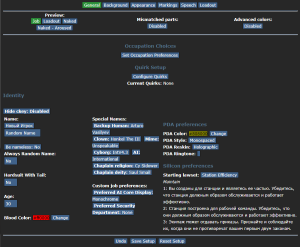
Character Settings
Во вкладке "Character Settings" вы будете настраивать своих персонажей для использования в игре. По умолчанию у каждого игрока есть около 30 слотов для новых персонажей, которые можно выбрать прямо под меню выбора вкладки. Чтобы отредактировать один из этих слотов, просто нажмите на него, и загрузится информация, сохраненная в этом слоте. Таким же образом можно выбрать персонажа, который будет появляться при вступлении в игру. (Это будет последний загруженный слот персонажа).
General
Эта вкладка также содержит ряд вложенных вкладок, в которых рассматриваются различные аспекты вашего персонажа:

- Name, Gender and Age: Не думаю, что тут требуется пояснение. Убедитесь, что вы правильно их настроили.
- Special names and Custom Job preferences: Не стоит беспокоится об этом разделе, если только не планируете присоединиться к игре в качестве одной из видов работ, перечисленных в данном разделе, что не рекомендуется для новичка.
- Quirks: Незначительные черты, которыми вы можете наделить персонажа. Есть отрицательные, положительные и нейтральные причуды, которые вы можете выбрать.
- Jobs Selection: Данная кнопка открывает меню для настройки профессий, на которых вы можете появиться в начале раунда, если вы решили присоединиться автоматически с помощью кнопки Ready. Когда игра начинается, сервер проверяет предпочтения каждого игрока в отношении профессии и назначает соответственно. Вы можете выбрать разный приоритет высокий, средний, низкий или никогда. Каждый игрок имеет только одну профессию с высокими предпочтениями. Практически все роли имеют ограничение на количество игроков - например, есть только один капитан. Также не стоит беспокоиться, если вы новичок.
Background
Эта вкладка позволяет дополнить информацию о вашем персонаже.
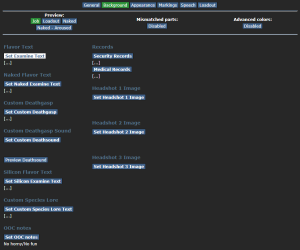
- Flavor Text, Naked and Silicon: Информация о внешности вашего персонажа. Это то, что видят игроки взаимодействующие с вашим персонажем . Наиболее важным является обычный текст Flavor описывающий вашего персонажа, Naked - дополнительный текст, который описывает вашего персонажа, когда он голый. Silicon появляется, когда вы играете за борга, что не рекомендуется новичкам, так что пока он можете забыть про него.
- OOC notes: Здесь вы рассказываете о своих предпочтениях в ролевой игре (например, фетишах, гендерных предпочтениях, о том, что вам нравится и не нравится делать) и вообще о том, что вы хотели, чтобы другие игроки знали OOC.
- Headshot Image: Вы можете добавить ссылку на изображение вашего персонажа, если желаете, главное чтобы оно соответствовало примерно вашему персонажу и игровой атмосфере, чтобы более подробно узнать как это сделать [жмякай сюда].
- Security and Medical records: Эти записи будут доступны определенным отделам в игре и могут влиять или не влиять на взаимодействие персонажей из этих отделов с вашими. Довольно бесполезный раздел для новичков совершенно необязателен к заполнению.
Appearance
На этой вкладке настраивается общий вид спрайта вашего персонажа, который вы можете увидеть в правой части окна.
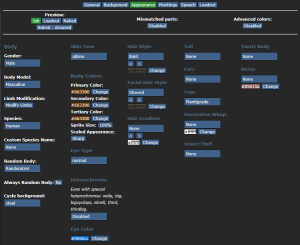
- Consent Preferences: Это переключатели, которые будут видны другим игрокам, чтобы узнать, что вас устраивает, а что нет. Они также включают и выключают определенные механики в игре в зависимости от ваших настроек. ERP - если вы не против эротических ролевых игр, Non-con - для изнасилований и похищений, а vore - само собой разумеющееся. Для каждого из этих параметров можно установить значение "Yes", "Ask" или "No".
- Body: В этом разделе есть несколько опций для базовой настройки тела персонажа. Gender и Body Model говорят сами за себя. Limb Modification - позволяют выбрать протезы конечностей и т.п. Species - дает возможность выбрать расу, к которой принадлежит ваш персонаж. В зависимости от того, к какой расе вы относитесь, ваш персонаж может использовать некоторые другие варианты спрайтов. Если вы хотите, чтобы ваш персонаж имел индивидуальную расу, отличную от перечисленных, вы можете задать пользовательское имя своей расе в Custom Species Name. Механически вы все равно будете принадлежать к выбранной расе, но ваш в описании она будет отображаться как ваше пользовательское имя.
- Body Colors: Это цвета, которые будет использовать спрайт вашего персонажа. Есть первичный, вторичный и третичные цвета, спрайты могут использовать один из этих цветов или их комбинацию.
- Clothing and equipment: Backpack - опция которая дает возможность выбрать один из рюкзаков, с которыми вы будете появляться, Jumpsuit - позволяет выбрать, в какой одежде вы будете после захода в раунд.
- Lewd, pregnancy and Genital preferences: Как следует из названия, они отвечают за некоторые непристойные аспекты вашего персонажа, а также за возможность и шанс забеременеть. Гениталии - это дополнительные органы, которые вы можете включить, чтобы добавить спрайты на персонажа, а также использовать их для непристойных взаимодействий в игре.
- Other sprite options: В игре есть множество опций, позволяющих настроить внешний вид персонажа: волосы, хвосты, уши, глаза и т.д. Все эти опции доступны независимо от расы.
Так же под вкладками настройки персонажа имеются еще три кнопки и сейчас я кратко расскажу, что они делают:
 Изменяет внешний вид персонажа так, чтобы он выглядел в своей рабочей одежде, одежде из инвентаря и голым.
 Позволяет использовать спрайты персонажей, недоступные для выбранной расы.
 Включает расширенный режим раскраски, позволяющий создавать более уникальные цветовые комбинации со спрайтом персонажа, хотя этот режим может быть немного запутанным для новых игроков.
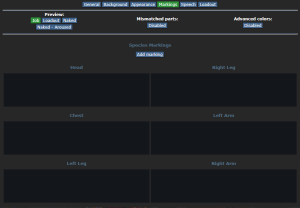
Markings
Эта вкладка позволяет еще больше кастомизировать персонажа, работая как дополнение к предыдущей вкладке. Вы можете выбрать различные метки для частей тела персонажа, которые изменят его внешний вид и позволят использовать различные цвета. Вы можете использовать несколько меток для одной части тела и редактировать их наложение, чтобы создать различные эффекты по своему усмотрению.
Speech
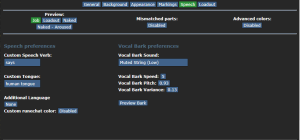
В данной вкладке вы настраиваете параметры, связанные с речью вашего персонажа в игре.
- Speech preferences: Они позволят вам настроить некоторые параметры, касающиеся определенных механик, связанных с речью вашего персонажа в игре. Если оставить их по умолчанию, то для этих настроек будут использоваться значения, заданные выбранной расой.
- Custom Speech verb: Когда вы используете глагол say, высказывание вашего персонажа будет начинаться с этого глагола, а затем с текста, который вы хотите, чтобы он произнес.
- Custom tongue: Выбранный вами язык может добавить определенные эффекты к тому, как ваш персонаж говорит в игре, вроде различных акцентов, которые могут быть у вашего персонажа.
- Additional language: По умолчанию все персонажи говорят на общем галактическом языке, что позволяет речь других персонажей на этом эе языке. Дополнительные языки позволяют персонажу общаться на них.
- Custom runechat color: Когда персонаж говорит, над его головой отображается текст, который он произнес, эта опция позволяет настроить цвет этого текста.
- Vocal bark preferences: Когда ваш персонаж использует глагол сказать, он будет издавать звуки, похожие на те, что издают персонажи в других играх, таких как Don't Starve Together или Undertale. Эти звуки называются "лай", и эти опции позволяют настроить лай персонажа. Вы можете предварительно просмотреть свой лай, чтобы убедиться, что он звучит так, как вам хотелось бы.
Loadout
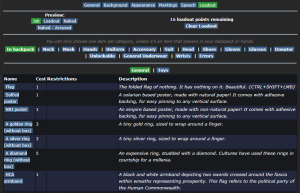
Под Loadout понимается снаряжение и одежда, которые персонаж носит или несет в своем рюкзаке/руках. В этом разделе есть различные вкладки, в которых вы можете выбрать предметы, которые персонаж будет носить в соответствующих слотах при появлении. Вы можете выбрать любой предмет или предметы для каждого слота, а также отредактировать название и раскраску предмета по своему усмотрению. Однако имейте в виду, что количество очков, которые вы можете потратить на снаряжение, ограничено, а каждый предмет стоит определенное количество очков. Также стоит отметить, что в каждый слот, кроме рюкзака и рук, можно положить только один предмет. Так же есть вещи которые появляются только у соответствующих ролей.
Preferences
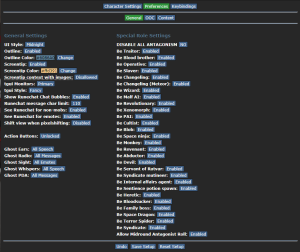
Вкладка "Параметры" - это раздел, в котором вы можете настроить общие параметры игры. Она похожа на страницу конфигов в других играх. Вкладка состоит из трех различных разделов настроек. Вы можете настроить их так, как считаете нужным, однако если вы совсем новичок в игре, рекомендуется не менять значения большинства конфигов (за исключением предпочтений контента), а оставить их такими, какими они являются по умолчанию. Далее будут рассмотрены разделы данной вкладки ПРОШУ ЕСЛИ ВЫ НОВЕНЬКИЙ НАСТРОЙТЕ ИХ КАК РЕКОМЕНДУЕТ РУКОВОДСТВО
General
The general preferences contain settings related to the appearance of different elements in-game, including the appearance of different types of information or texts in the game window as you play as well as the appearance of different interfaces you'll interact with. It also contains options related to your chance to become an antagonist automatically during the game. Although this mechanic is disabled in the game and the appearance of antags in the station is incredibly rare, it's recommended that you make sure your DISABLE ALL ANTAGONISM option is "Yes" if you're new to the game.
OOC
The OOC tab contains settings related to the appearance and behavior of different windows and interfaces of the game. It also handles some setting regarding OOC preferences about how you interact with different aspects of the game, like hearing music played by admins for example. The only option from this tab that you should probably look into as a new player is the FPS preference. This will allow you to change the framerate at which the game is displayed on your end. You might wanna set it to a higher value than default (e.g. 60 FPS).
Content
This tab containts options for what kinds of content and mechanics you'd be ok with interacting as you play, mostly related to different kinds of kinks and lewd content. Our station is focused on ERP and nsfw content, and to facilitate this a lot of different mechanics have been added to the game, which vary from oriented towards general lewd interactions to more kink focused content. Unlike the previous two sections, you will want to configure these preferences depending on what type of lewd interactions you'd like to experience in the game, from a mechanical standpoint of things. Just like you would place your kinks and limits in the OOC notes of your character, it is recommended that you toggle these settings depending on what type of content you'd like to interact in the game.
Keybinds
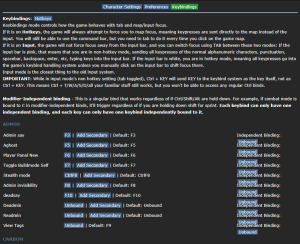
The keybinds are the different interactions that will be performed while in-game when pressing in your keyboard's different keys. Just like they would in any other game, these keybinds can be easily configured to provide you with a more comfortable and easy way to interact with the game depending on your playing style. If you're a new player, it's also recommended that you leave them as they come by default until you're more familiar with the game.
Joining the Game
Now that you've created your character, you're ready to join the game. (You may want to continue to read the guide before jumping in.)
There's two possible menus here - the lobby screen will either display a list that has Join Game! or a Ready/Not Ready toggle.
If the window says Join Game!, there's currently a round going on. This is most likely what you'll see.Click on the button, and a window will pop up asking you to choose a profession. The jobs available will vary, but Assistant is always available*. The numbers in the brackets next to the job title show the current number of players who have been assigned that job for the round, if there is a zero inside the brackets, no one has been assigned to that job for the round. When you click on the job you want, you'll be brought to the station via the arrival shuttle. You'll start out on a transit shuttle that will dock at the station in a few seconds. You'll also be strapped into a chair, so don't forget to unbuckle yourself (click your seat, the Buckled HUD icon or press the resist hotkey if enabled).
If the window has three buttons that say Ready, Not Ready, and Observe, that means a round has not started yet.This is ideal, because you'll be playing the round from the beginning, when things are the going to be calm and allow you to get your bearings in a relatively safe environment. Toggle the button to Ready, then wait for the game to begin. (You can see the time until the game begins on the Lobby tab, on the top right of the game window.)Pressing Observe will spawn you as a ghost, which is essentially a spectator - you won't be able to spawn normally until the next round if you select this option!
*Sometimes, at the start of a round, a different service job is chosen to be the infinite slots job at random. If Assistant is not available, just click the one with the highest numbers. Don't worry, people generally won't pester you with any responsibities once they realize that the bartender is actually just one of 27.
Interface 101
Tabs
Before you do anything else, take a look at the top right of the game window. You'll see some tabs labelled Status, Lobby, Admin, IC, OOC, Object, and Preferences. The Admin tab contains the Adminhelp button, used to contact admins directly if you have a question or believe someone is breaking the rules.
While the Status tab does not have any buttons for you to push, it is a very important element! The Status page displays the time that the round has been going for, the Round ID, which is useful if something happened during the round that you want to bring up with an admin, the pressure in your airtank, the current map,
It is quite self-explanatory! Should you find someone breaking the rules of the server, or find yourself with an issue that requires the intervention of a moderator, you are free to make an Adminhelp, or Ahelp for short, to have it sorted out!
This will be the most important tab to you, the SPLURTer! In here, you can a bunch of verbs, some of the more important ones beings:
- Say: This verb will open up a window, in which you can talk as your character. Also includes a say_indicator option, for when you want to guarantee that the world sees your character about to speak!
- Me: The Me verb, when used, will open up a large window, in which you can describe what your character is doing. An example of this would be "Sits down and looks up." When written, it will then be put into the chat window as "CHARACTER sits down and looks up." Much like the Say, includes a me_indicator option, for a guaranteed indicator.
- Whisper: This verb is another version of talking, in which your character's speech will only be visible to the people standing next to your character.
- Subtle: Subtle is an alternate version of Me, in which your character's emote (what they're doing) is only visible to those next to your character. The Subtle verb also includes Anti-Ghost, in which observers can't see your emote, Around Table, where those on the opposite side of a table would see your emote, and Chat Indicator, to show others that you are currently writing, but the text itself will only be shown to those next to you.
- Pray: Pray is a feature which allows you to plea to the Gods, IE, the Admins, in an in-character fashion. This is primarily used for requesting an item
- Examine: Examine allows for you to 'look at' the people within your vision. This lets you see all of the things that they are currently wearing, check if they have any damage that you can see, IE "They have moderate bruises", and access the character description, and OOC notes. Check Out, a similar command, does the same thing, but informs the person you are inspecting.
The Mentorhelp and Mentorwho, are buttons that allow you to ask a question to a Mentor, and see which mentor is around. Now, Mentors are veteran, experienced station-goers that know almost, if not truly every aspect of the server, and how it operates. Should you have a question about how the game works, they are your first line towards an answer!
Now, the OOC tab is one that you will find yourself flicking to regularly, but not as much as the IC tab! The most important commands of the OOC tab, would be:
- OOC: OOC allows you to talk in the OOC (Out-Of-Character) chat! Keep in mind, these messages are visible to EVERYONE on the server!
- LOOC: This verb is similar to OOC, but, instead is an OOC message that only those within your line of sight can see. Useful for talking with an RP partner, or asking someone a quick question!
- The Character Directory: The Directory allows for you to see a list of every single character currently on the station, as well as access their descriptions, and OOC notes, from afar! Also used for advertisements for roleplay, and quick summaries of the character.
- Show Station Minimap: Quite self-explanatory! With this verb, you receive a small minimap, which shows the current station. While it does not show you where you are, it is very useful for getting some bearings!
- Fix Keybindings: Should your keybindings, like T for Say, not work, use this button! After a short moment, usually one or two seconds, your keybinds will work!
- Fix Chat: If your chat at the bottom right is entirely blank, and no messages are appearing on it, this button is to be used! Resets the chat, and, if all is well, fix the issue!
- Changelog: the Changelog allows for you to look at the latest updates for the server, and see what's changed!
the Preferences tab, to go deeper into the subject, contains the toggles for various features and noises that some players might find disruptive. The ones that you may find yourself toggling a bunch of times, dependent on the server, would be:
- Game Preferences: the Game Preferences tab is a quick shortcut to access content preferences and OOC preferences, like the color of your text, or whether or not you even wish to hear the sounds of lewd activites around you.
- Hear/Silence Instruments: If jukeboxes and player instruments annoy you, this verb will mute them entirely.
- Hear/Silence Midis: Admins playing Dagothwave five times in a row? The Midis verb will disable any admin-played music.
- Hear/Silence Vocal Barks: Vocal Barks are noises that all characters make while talking. Be it chittering or low banjo, if you don't want to hear them, this is the button for you.
- Toggle Eating Noises: Quite Self-explanatory. Mutes all eating sounds, for those with misophonia.
- Show/Hide OOC: Also self-explanatory! Hides the OOC chat entirely, to let you focus on that roleplay!
- Hear/Silence Lobby Music: Should the randomly-played lobby music annoy you, this button will mute them.
In the Status tab, take note of the map currently being played on the server. It'll be used later in the guide.
HUD
The biggest barrier to entry in Space Station 13 is the controls. The UI is, at a glance, complex, and the controls are unintuitive. Thankfully, once it clicks, you'll never have an issue with it again. Don't let it overwhelm you - after a round or two of practice, you should be fine.
The top right of the screen contains the action tabs mentioned previously, and the bottom right is the text log. This is where you can see what people are saying, what's happening around you, and chat such as OOC or adminhelps. The bar along the bottom of the screen is the input bar, but since we're on Hotkey mode we won't need to use it. There's quite a few HUD elements on the main screen, so let's break them down into sections. Don't worry if you can't memorize what everything does at once - you can always come back to this guide.
The backpack ![]() icon can be toggled to show your worn equipment.
icon can be toggled to show your worn equipment.
The belt ![]() , backpack
, backpack ![]() , and pocket
, and pocket ![]() icons are all storage locations.
icons are all storage locations.
The drop ![]() and throw
and throw ![]() icons do what the name implies. Dropping is self explanatory, but the throw button is a toggle - if it's on and you click somewhere, you'll throw the item in your hand at where you clicked. (You can also press R to enable throwing and Q to drop your held item.)
icons do what the name implies. Dropping is self explanatory, but the throw button is a toggle - if it's on and you click somewhere, you'll throw the item in your hand at where you clicked. (You can also press R to enable throwing and Q to drop your held item.)
The pull ![]() icon only appears when dragging something, and can be pressed to stop dragging an object. Hotkey: "del".
icon only appears when dragging something, and can be pressed to stop dragging an object. Hotkey: "del".
The rest ![]() icon lets you lie down on the floor, and crawl into crates or under flaps. If you actually want to rest, click the Sleep verb in the IC tab. Hotkey: "U".
icon lets you lie down on the floor, and crawl into crates or under flaps. If you actually want to rest, click the Sleep verb in the IC tab. Hotkey: "U".
The internals ![]() icon can be clicked to enable/disable your internals (oxygen tank and breath mask).
icon can be clicked to enable/disable your internals (oxygen tank and breath mask).
The resist ![]() icon can be pressed to break out of grabs, restraints, and if you're on fire, is the "stop drop and roll" button. Hotkey: "B".
icon can be pressed to break out of grabs, restraints, and if you're on fire, is the "stop drop and roll" button. Hotkey: "B".
The run/walk toggle Файл:Hud-walkrun.gif icon can be pressed to switch between running and walking. Running is faster, but walking has benefits, such as being able to walk over water without slipping - useful for when the janitor doesn't put wet floor signs down. Hotkey: Hold "alt" to walk.
The body selector ![]() icon is used to choose which body part you want to target. This is used for both targeting specific sections to heal, or targeting specific sections when attacking someone. Click a limb to target it. (You can target individual arms, legs, the head, the upper torso, the groin, the eyes, or the mouth.) Hotkeys: "numpad keys".
icon is used to choose which body part you want to target. This is used for both targeting specific sections to heal, or targeting specific sections when attacking someone. Click a limb to target it. (You can target individual arms, legs, the head, the upper torso, the groin, the eyes, or the mouth.) Hotkeys: "numpad keys".
The crafting menu Файл:Craft.gif icon opens the crafting menu.
The speech bubble Файл:Talk wheel.gif icon opens the languages menu. You won't need to use this for the tutorial.
The create area Файл:Area edit.gif icon is used to create an "area", which is a more advanced topic. You won't need to worry about it for this tutorial.
The skills Файл:UI Skills.png icon shows you your skills in certain contexts, like mining. You won't need to worry about it for this tutorial.Файл:Hud-oxy.gif Oxygen warning - The air you're breathing doesn't have enough of oxygen (or other substances) (black), or too much (red). You'll usually see a black oxygen warning from being exposed to space. Put on a gas mask and have an oxygen tank! You can put a small emergency oxygen tank in your pockets or belt if you don't want to be holding it, and if you can find a hazard vest or suit you can put it in the leftmost storage slot. You can find small oxygen tanks and masks in the survival box in your backpack and in blue oxygen emergency lockers. They don't last very long, though.
Файл:Hud-pressure.gif Pressure warning - Pressure levels are too high (red), or too low (black). Low and high pressures can kill you. You'll usually see a black pressure warning from being exposed to space. Put on a space suit! There's hardsuits in the red fireman lockers.
Файл:Tox in air.gif Toxin warning - You are breathing in toxic gases.
Файл:Hud-fire.png Fire warning - The air is hot enough to burn you.
![]() Freeze warning - The air is cold enough to freeze you.
Freeze warning - The air is cold enough to freeze you.
Файл:Hud-temp.gif Temperature warning - You're too cold or too hot.
![]() Hunger warning - You're either fat, hungry, or starving. Being fat slows you down considerably, so consider eating less.
Hunger warning - You're either fat, hungry, or starving. Being fat slows you down considerably, so consider eating less.
Controls
The controls might seem a tad excessive, but don't worry - you'll only be actively using a few of the many there are. There's a lot of edge cases in SS13, due to the sheer nature of features and content available. You can check this page for a list of every keybinding. Although your control scheme was changed to Hotkeys in the Game Preferences menu, it may not have applied itself - if there is a large red bar going across the bottom of the screen, click somewhere on the game window and press Tab. This is the manual toggle for hotkey mode - if the bar changes to white, you're good to go.
- Use WASD to move.
- Press T to talk.
- If you add a semicolon before anything else, you'll transmit your message to the general chat radio.
- You can speak on department specific radio channels - the format is the same for each, just with a different letter. To speak on the medical channel, for example, type .m before your message. (You can also use :m or #m)
- Press O for OOC chat.
- Be careful not to mix the two chat buttons up - your cry for help might end up going in OOC, where anyone can see it at any time.
- Press M to write an emote.
- This is for nonverbal actions - for example, writing "sighs." in the text box would show as "[Character Name] sighs."
- Шаблон:Leftclick on objects in the game world to interact with them. For most, you'll need to be next to or on top of the object.
- This is used for things such as interacting with computer terminals, picking up items, using an item on something, or attacking someone.
- 'Shift+Шаблон:Rightclick something to open the context menu, which can be used for a variety of things.
- Context menu is slow and clunky, and you can usually perform most actions with hotkeys instead. There are a few examples of actions that can only be done with the context menu, but they're far and few between.
- Шаблон:Tooltip Left-click on something while holding Control to drag it.
- Hold Shift and Шаблон:Leftclick on something to examine it.
- Press X or Middle Mouse Button to change your selected hand.
- Your selected hand is the one that will pick up an object (if empty) or use the object in that hand (if holding something). You can tell which is selected by the small box around one of your hands.
- Clickdragging is used for a couple of specific actions.
- For example, to climb onto a table, drag and drop your character to the table.
- To put things on/take things off of someone, drag and drop their character onto yourself. (To put things on them, you'll need to have the item in your selected hand.)
- You can open a container without holding it in your hand by alt-clicking it or clickdragging it onto yourself. This also works for storage items you're wearing, which is useful if your hands are full.
- You can also buckle yourself/other people to chairs using this. It can be tricky, as you have to be on top of the chair, and your mouse has to be on top of the chair's exposed sprite.
Gameplay Concepts
Before getting into anything else, it's important to note that since SS13 is such an open ended game that has other people in it. If things happen to go wrong, there are multiple ways you can be brought back into the game - don't get frustrated if something happens.
There's a few specific concepts that are often stumbling blocks for newer players, so let's address those first. (These are all in expandable boxes to save space, but it's not a bad idea to read them beforehand.)
The Hands System
One of the things the majority of new players have trouble with is the hands system. It's not complex once you've figured it out, but it can be difficult to understand without help.
You have two hands at your disposal. The bright box around one of your hands is the selected hand. This is the hand that's used whenever you click on something - if it's empty, you'll either pick up an item, or interact with something (like a computer terminal or vending machine).
If you have something in your selected hand, you'll use that item on whatever you click on. This can lead to confusion, because if you have something in your hand, you can't use things such as terminals or vending machines - you'll either hit the object with your item or do nothing.
This is because you're trying to directly use the item on the object - this is why you're able to use a screwdriver to open the panel on a door, use wirecutters on a grille, or similar actions.
This can also cause problems with backpacks, boxes, and other containers - if you want to open a container, alt click it. You can also pick it up, then switch hands and click on the container with an empty hand. Clicking on a container with an object will put it in the container. This also means that if you'd like to take your backpack off, you need to click and drag the bag to an empty hand - a normal click just opens the equipped bag.
Basic Interactions
These are basic interactions you can perform when clicking people with an empty hand. Some require Шаблон:Combat Mode to be on or off (press 4 to enable, 1 to disable or F to toggle). Combat mode should be kept off by default or you will block people. Read more here.
Файл:Help action.png Help Файл:Help 32.png
Combat mode must be off. Is used for friendly interactions, such as giving hugs or performing CPR. Be careful - if you have an item in your hand that isn't designed to help someone, you'll still attack them with it!
 Disarm Файл:Disarm 32.png
Is used to non-lethally push people away or against walls. Read more here.
Файл:Grab action.png Grab Файл:Grab 32.png
Allows you to grab people and also upgrade grabs. Read more here.
Файл:Harm action.png Harm Файл:Harm 32.png
Combat mode must be on Файл:Combat 32.png. This lets you punch people, or kick them if they are prone. Read more here.
Damage
There are a few different damage types in SS13. Some common ones are brute, burn, toxin, suffocation. If you take enough damage you'll fall unconscious into critical condition, better known as Crit. If left untreated in this state, you'll slowly suffocate until you die. Read more about damage types here. To learn how to best treat them see the Guide to medicine.
Combat
Combat in SS13 is very heavily focused on who falls over first. If you're prone, you've likely lost. This means items like soap Файл:Soaps.gif or disablers Файл:ModernDisabler.png are extremely useful.
If you get into a fight, then, something has gone wrong. The server will not have you battling for your right to survive on the station, and, should you get into a fight, consider your options. It may be best to try and simply run away, and avoid the conflict. If you think you can disarm your opponent and stop the fight before anyone does something they'd regret, you could turn the tables by taking their weapon. Combat in SS13 is fast paced and revolves around a lot of back and forth swipes, almost like a strange joust between 2D spacemen, should you ever get in enough trouble to have to resort to violence.
Getting better at combat in SS13 requires practice - there's only so much you can be taught. The rest is learning how to create and take advantage of opportunities. Thankfully, combat is almost nonexistent, and would mostly be you against some non-crewman creature, so you wouldn't have to worry about any of that!
To learn more about combat and how to win potential fights, see the Guide to Combat.
Ghosts
If you end up dying, don't worry, there's a few ways to go from there.
If you try to move, you'll ghost out of your corpse. This is essentially spectator mode - you can communicate with other dead players (and talking about the round out of character is okay in this chat) by talking normally and are able to fly around the entire map. (Note that while it's okay to talk about the round in deadchat, if you're revived, you cannot use any information gained while dead. Anything you saw while alive is fair game.)
If you die, you can be revived, turned into a podperson, have your brain removed and put into a cyborg, or more. There are ghost roles that can be played by dead players - some areas have objects that, when clicked on as a ghost, will spawn you as a new character. (As you become a new character, don't use any information from your past life.) There may even be alerts that pop up while you're dead, asking if you'd like to take control of certain mobs in the game. These are often provided by admins, but can occasionally happen via random event. Please note that if you take on a ghost role you CANNOT be revived or return to your original body!
We understand that sometimes the game may not play fairly due to connection issues or general lag. Which is why admins take the freedom to grant revives to players that make an ahelp or a prayer, an in-character way of appealing to the admins without the seriousness of an ahelp. While the blanket rule is that the players receive two additional chances at life, they will not always be granted! Approach the staff team with respect, and you'll have a much higher chance of getting your shot!
Playing the Game
 |
C-05-MO, the AI говорит: "Hello! The automatic diagnostic and announcement system welcomes you to Space Station 13. Remember: Have a secure day." |
Now that we've gone over the interface and some more important game concepts, let's jump into the game. If you join a game in progress, you'll usually spawn on the arrival shuttle. (You'll start buckled onto a chair as the shuttle docks with the station - press the Resist button on the HUD or the picture of the chair to unbuckle yourself). If you "readied up" while the server is starting, you will be placed in an area respective to your role! Captains will be in their offices, the scientists in the Research Department, etc!
SPLURT station has multiple maps that the server will vote for at the end of every round. The game can take place on a large range of different maps that are voted for at the end of a round. You can visit the individual wiki pages to see the layout of a specific map.
Each station has a unique layout, so feel free to use these maps to guide yourself with.
- "BoxStation" Click here for a map of BoxStation. Visit the wiki page for BoxStation for more details.
- "MetaStation" Click here for a map of MetaStation. Visit the wiki page for MetaStation for more details.
- "DeltaStation" Click here for a map of DeltaStation. Visit the wiki page for DeltaStation for more details.
- "TauStation" Click here for a map of TauStation. Visit the wiki page for TauStation for more details.
If you've chosen Assistant as your role, you'll have no responsibilities. This means you can safely attempt to get your bearings without fear of someone telling you that you need to be doing something. It might be awkward at first, but it doesn't take much time to get to grips with how to control your character.
What to do if There's a Breach
If you hear the telltale sound of air being sucked out of a room or see a hole in the station, something's gone wrong and caused a breach. It's wise to avoid being exposed to the vacuum of space for too long, but if you need to pass by, you can put internals on.
When you spawn, inside your backpack is an emergency kit with a small tank of O2, a breath mask, and an epipen to stabilize someone who's in crit.
- Step 1
- Using an empty hand, click on your backpack, then click + drag the box inside to your character's sprite. This will open the box.
- Step 2
- Take the breath mask and put it on your mask Файл:Hud-Mask.png slot (press the equipment
 icon to see it).
 - Step 3
- Take the O2 tank and put it in one of your pockets. This leaves your hands free for other tasks.
- Step 4
- Press the internals
 icon to turn on your air supply.
This will keep you breathing clean air - make sure to avoid exposure to a vacuum for too long, and watch your air tank's supply in the Status bar!
Файл:Backpack.png Inventory Management:
|
What to do in your First Round
As explained before, Assistant is the best starting role for players first interacting with the station due to the lack of objectives or responsibilities. This means you're free to explore the station and learn about the game, and most importantly, roleplaying and interacting with other people's characters. Trying to immediately tackle a department that's high-intensity, like Medical or Security, will quickly overwhelm you, and you may lose the fun in wanting to try it. The only way to learn is through trial and error, and people are quite forgiving of mistakes, however, when you join as an assistant you're free to make new friends and let them teach you about how the many aspects of the station work. The best way to learn a department is to ask for help! A lot of the server's occupants will gladly explain the functions of a department, without having you thrown into the brink of it yourself.
What Jobs to Take After Your First Round
 |
Julie, the Captain говорит: "You're brand new here so consider what sort of stuff you want to do. Wanna help people recover from their workplace injuries and dismemberment? Consider applying for our Medical Doctor program. Wanna unravel the mysteries of the universe, and also make massive, massive explosions? Get your degree in theoretical physics and become a Scientist. Wanna put your back into work and really get down and dirty with the station? We got openings in our Botanist, Chef, and Janitor programs. If you're here at the start of the shift, those'll put you in your workspace, with plenty of tools to get the job done. Nanotrasen usually has checks to make sure fresh meat doesn't get to be the Captain, but if you manage to end up in that position, you'll probably become another case for me to solve." |
- Though many say that Assistant is the best starting role, the lack of a focused objective can make learning the game difficult. If you feel like you've learned enough of the game, you might be better off trying a role that isn't all too critical to the game, but still has a job to do, such as a Service-related role like the Chef, Cargo Technician should you wish to experience the logistics side of Space, Janitor for a simple cleaner's life, or Prisoner.
- After you've gotten used to the controls and general idea of the server, you might want to move to a role such as the stalwart Scientist, plant-growing Botanist or the critical Station Engineer. These jobs have more depth to them than some other roles. Keep in mind, however, that the Engineering department will ask a lot of you, so do read up on your tools before trying it!
- Playing security roles like the Security Officer or Warden before you're proficient with the controls and know enough about the game to treat people fairly is not encouraged. It's very easy to play security poorly, and letting the power get to your head is a bad idea. Security is an intensive job, that will constantly have something be asked of you!
- You'll want to avoid round critical roles such as Captain, AI, or any heads of staff until you're well versed in the game and know what's going on. If, by some coincidence, you end up being one of these roles and you aren't prepared, you are more than welcome to cryo! That will open the slot for another player, and nobody would judge you for doing so!
